Sunday, 24 May 2015

How To Draw: Beetles

Insects are everywhere at this time of year and among them are beetles. There are so many species of beetle that it would take years to draw them all, but drawing them out in the field can help in identifying them later on. Beetles come in so many shapes and sizes, so can be quite interesting to draw. The method in drawing them can be used for other insects too.

Stage One
We will start off with a ground beetle. The structure of any insect is made up of three parts; the head, thorax and abdomen. The head and thorax are circles, while the abdomen is an oval.


Stage Two


I redefine the shape a little bit of my beetle's body and add in details like the eyes, jaws and carapace structure. The antenae are simple lines and the abdomen is devided in two as they are wing cases. The six legs of most beetles come in three segments; a thick, shorter part attached to the body, attached to that is a longer part that is of medium thickness and attached to that is like a thin 'foot' of variable lengths.


Stage Three


Draw over the pencil lines in pen and rub them out afterwards. Be careful when drawing round the legs and antenae. I have also added a few hairs and spurs to parts of the legs.


Stage Four


 Colour your beetle in. Mine is a green tiger beetle and it is green with yellow spots and jaws and red legs. Over the green and red areas, I very, very lightly shade in with a pen for texture.


Stage One


My next beetle is a national favourite, the ladybird (or ladybug if you are American). The three parts are more rounded for a ladybird than it was for a ground beetle. The head is also much smaller.


Stage Two


The legs of a ladybird are shorter than that of the green tiger beetle and are much bulky in thickness. Mark out the shapes for the white patches and add in the antenae and mouth parts. I have also drawn a blade of grass for it to climb on.

Stage Three


 Draw over in pen and shade in the black areas of the head, thorax and legs. A blade of grass up close has many hairs on it, so using the pen, I create lots of little lines for them. You've probably noticed that I haven't added in the spots yet. From experience, I have found if you colour over the ink of the spots, there is a good chance that the ink will run and ruin the smooth and vibrant colour of the wingcases. Best to do them last.
Stage Four


The colouring stage is mostly focused on the red wingcases. Lay it on as thick as possible. For the spots, count them and work out where each goes and which size they all are. Use a pen and create a black spot as bold as you can. The legs can be brown or black, but the invasive harlequin ladybirds have orange legs.


Drawing Stage


 My last beetle for today is the UK's largest and most impressive, the stag beetle. It is also one I have yet to see in the wild, but drawing one will have to do for now. The body shape of a stag beetle is the same as a ground beetle's but much larger. Only the males have antlers and to draw them, draw two rectangles and within them, draw the curves and spikes. The legs are longer than the ground beetle's, but are drawn pretty much the same way. Draw over detail such as the eye, antenae and the edging at the base of the head and abdomen.


Pen Stage


After drawing over the outline in pen, shade the beetle in. Shade lightly for the abdomen and antlers and a little darker for the head and thorax. The head of a stag beetle is rather squared by lumps and bumps, shade boldly for these edges to show up. All the legs are black. And yes, I did move one of the legs down a bit.


Colouring Stage


Colour your stag beetle in. The antlers are red, the head and thorax are black with yellow edgings and the abdomen is a mix of brown, red and black with a light shading from my pen. My stag beetle is ready to fight for a mate!

As I said before, there are hundreds of species of beetle out there to draw and a lot of them can be found in your garden or local park. So what are you waiting for? Get out there and draw them! If you have any suggestions of what you want me to draw next time, please comment below. Until next time, keep drawing!

Thursday, 21 May 2015

May 21st Holt Country Park and Cley Marshes NWT

The Holt Giant wood sculpture
After seeing my first orchid of the year yesterday at Strumpshaw with that common twayblade, I am at Holt Country Park with my mum to find my second. I have read about this site being good for bird's-nest orchids. This is an orchid that has 'needle in a haystack' written all over it. It will be difficult to find as it is brown and looks dead and stick-like. This appearence is due to the fact it gets it's nutrients directly from the roots of beech trees and has no need for leaves to photosynthesis and that means no chlorophyll, the stuff that makes a plant green. The plant's name comes from the plant's roots that resembles a bird's nest. As interesting as this plant is, we had no luck finding any during today's visit.

The search for orchids may have failed, but there were other exciting things we encountered on the way round. At a pond, we saw a heron land on top of one of the pine trees for a few moments and we heard what I believe is a firecrest. In the video below, listen out for a loud, fast, high pitched trill. We also heard the songs of yellowhammer, reed bunting, chiffchaffs, linnet, blackcaps, stock doves, buzzards, coal tits, goldcrests, long-tailed tits and even a tawny owl making a series of territorial 'kewick' calls. While searching a bank beside a path, I disturbed a slow-worm, which slithered and wiggled to saftey in a mound of decaying foliage.


Dunnock
Spider-hunting Wasp Anoplius viaticus (I think)
Another wood sculpture
We came across a lot of other woodland plants including bluebells, red campion, ramsons, rhododendron and wild strawberry. There was an area fenced off for wild plants to grow and a lone lily of the valley was the best of the lot growing there. It's beautiful white bells totally made up for not finding an orchid.
Lily of the Valley
Rhododendrum
Wild Strawberry
Creeping Buttercup with beetles feeding on it
Ramsons

Broad-bordered Bee Hawkmoth
As we returned to the car park, I noticed a fast moving insect hovering by the red campions. At the time, I identified it as a hummingbird hawkmoth, but I later learned that it was something much rarer. I was told by the wardens that it was a broad-bordered bee hawkmoth, which like the hummingbird hawkmoth, are migratory moths from Europe and feeds while hovering. It is Europe's answer to the hummingbirds of the Americas. I was lucky to get one good shot of this very fast moving creature. There were a few butterflies today too, including brimstones and holly blues.
Brimstone

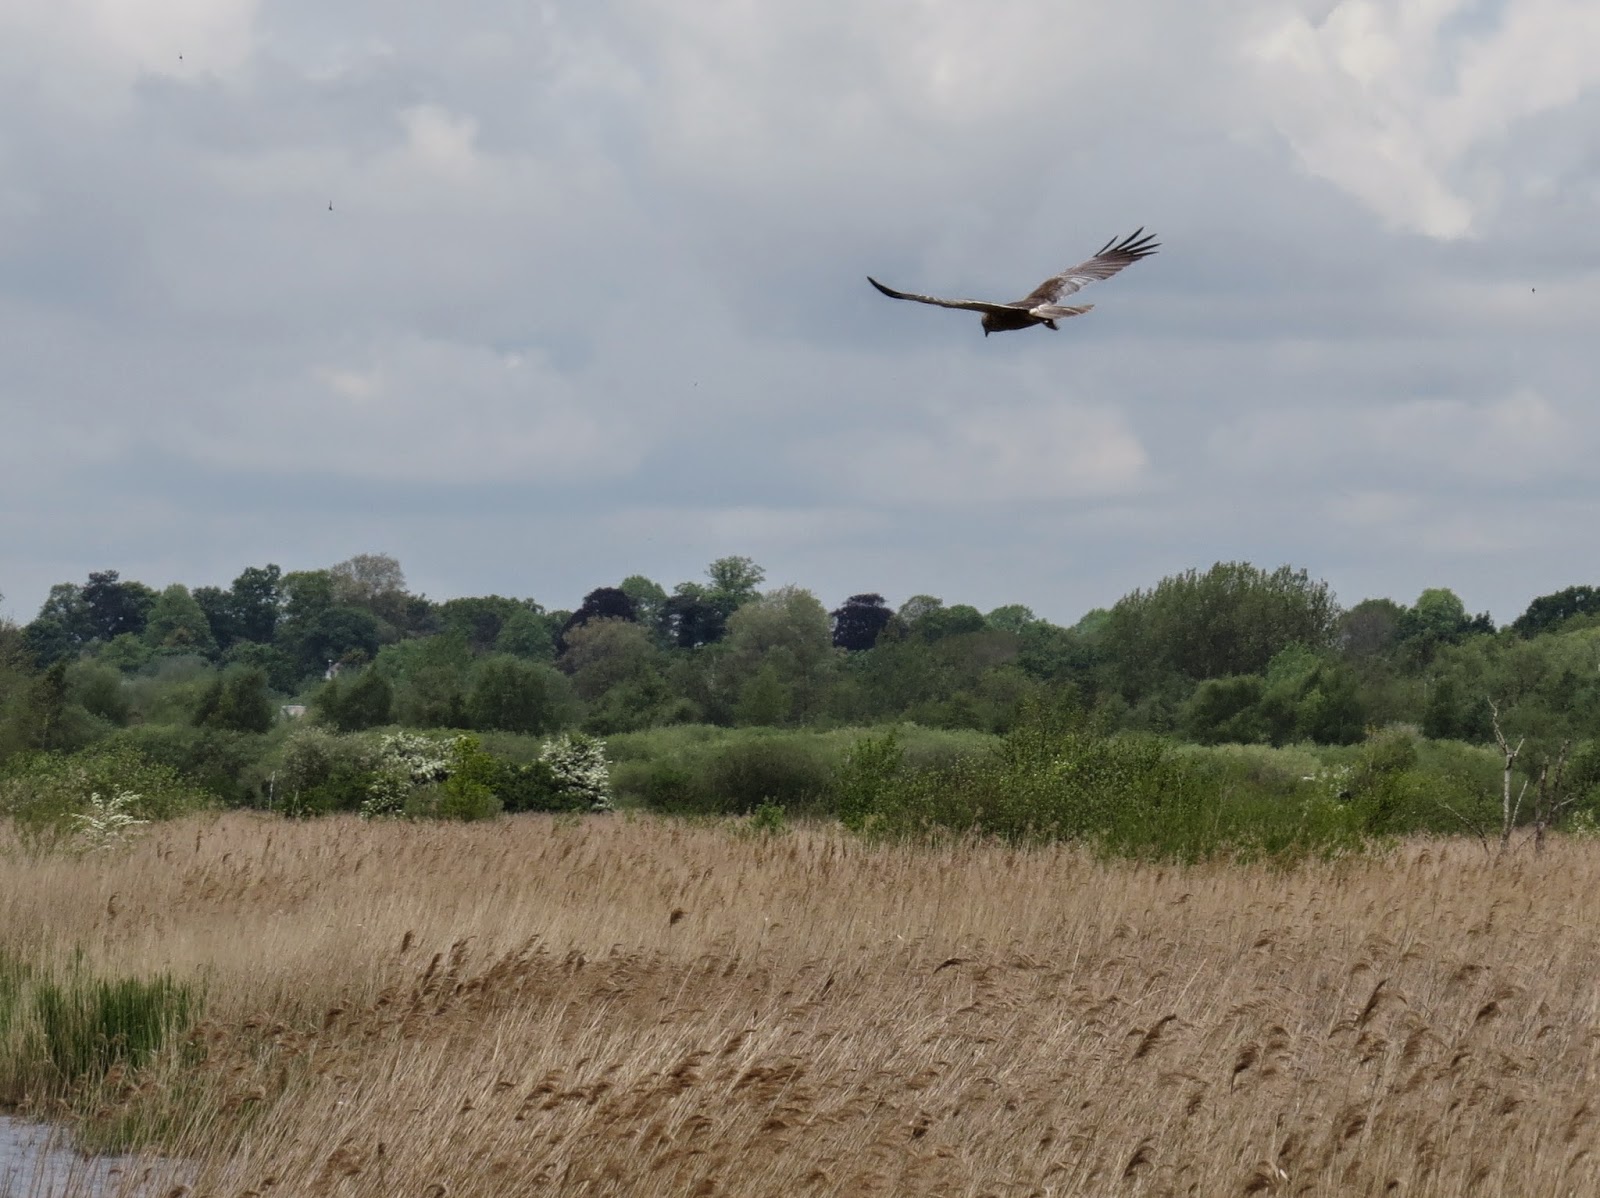
After lunch, Mum and I made our way to Cley. We were a bit disappointed with our views from the hides, as there were very few birds to see. A handful of avocets, shelducks, black-tailed godwits, a pied wagtail, a marsh harrier carrying nesting material and a few ducks, that was about it. The low numbers of birds made the landscape they were in seem very vast and empty than usual.

Pied Wagtail
Avocet
Apparently, the action was had from the East Bank. There were several good birds around there including a couple of nice migrants. Of course we had to go check it out and we found that we weren't the only ones. A crowd formed on part of the bank with scopes pointing out onto the marsh below them. On the way, we noticed that there were more birds here than there were from the hides. Redshanks, lapwings, mute swans, oystercatchers, little egrets, shelducks and an enormous crèche of greylag goslings, with a family with even younger goslings following behind.

Greylags with goslings
Greylag crèche
Curlew Sandpiper and two Ringed Plovers
When we reached the crowd, an NWT (Norfolk Wildlife Trust) volunteer pointed out the migrants that everyone was looking at. A curlew sandpiper, which should be at it's breeding grounds in the Arctic by now, was hanging out with a couple of ringed plovers. It is slightly larger than a dunlin and has a slightly longer curved bill. These birds have came from North Africa and are here for a pit stop to help them continue their journey north.

Pectorial Sandpiper

Behind them and on the other side of a pool of water was a pectorial sandpiper. This bird is an American wader that has flown off course from across the Atlantic Ocean and has ended up here at Cley. Every year, a couple or more pectorial sandpipers turn up here, but will always fly back to the States after a quick refuel. They may not look exciting, but I guess the draw of seeing both these sandpipers is the long journeys they have made. Nature is always turning up new surprises.

Wednesday, 20 May 2015

May 20th Strumpshaw Fen

The wildlife at Strumpshaw are always welcoming
The news at Strumpshaw this week is that the first swallowtail was seen on Sunday. Unfortunately, the weather since then has been awful. Today is a bit iffy too, as it is cold and overcast with showers appearing later on during my shift. That means there were no swallowtails today. Maybe next week.


Common Twayblade
I saw my first orchid of the year today. Here at Strumpshaw, we keep an eye on our scarcer orchids and protect them with chicken wire cages. I have been checking on them every week since their cages were installed. One of them is the common twayblade. Since I first started volunteering here in 2011, this green orchid has always failed to flower or grow due to pests eating them. To my surprise then that I got to finally see one for the first ever time with a couple of small flowers on it. It is still in development, but hopefully next week, I will get to see it with a complete set of flowers.


The flowerbed was still full of insect activity despite of the cold weather. Blue-tailed damselflies, orange-tips, hoverflies and bees were busy pollinating or resting on the plants the staff have put out for them. The 'bee log' had many solitary bees, like red mason bees, were searching for nesting holes. I also found a small caterpillar trying to cross over to another leaf, so I gave it a hand but only for it to be blown off by a gust of wind moments later.
Blue-tailed Damselfly
Orange-tip
The caterpillar I 'helped'


Mallard with ducklings
There was drama at the Reception Hide today. It all revolved around a family of mallards. We counted 9 very young and fluffy ducklings. They were going to find life tough this morning. It all began when their mother took them along the developing reedy edge by the hide. This took them into an angry male mallard's personal space and he chased her and the ducklings away. She tried again but was chased into the air. She disappeared for some time, leaving her babies alone and vunerable. They were clearly wondering where their mother was and they searched for her. As they explored the edges of the reedbeds, calling in hope of a response, they attracted danger.

Looking for Mum!
I was showing a one year old girl and her brother and mum the ducklings, when a marsh harrier flying closeby over a different area of reedbed got my attention. I showed the children the big bird flying towards them. My hands were full as I held the one year old toddler to see over the blind beside the hide outside and was unable to use my camera to capture what happend next. The male harrier heard the peeping duckling and dived down to successfully grab one and carried it off over the reeds. I think the children were too young to understand what had happend, but for us grown-ups, it was an incredible moment, though a bit sad for the duckling. Eventually, the mother duck did return and they were reunited. The harrier did came back hoping for another, but this time failed. With their mother, they were safe, for now.
Reunited!

The Marsh Harrier returning for seconds 


Also today; swallows and swifts swarmed over the reserve in great numbers, pochards were looking good with their striking red heads, buzzards circled from high above, a pied wagtail made a visit in front of the Reception Hide and the coots were about with two bald-headed chicks. Back in Norwich, there was sad news as the youngest of the peregrine chicks had died. I was reassured that he didn't go to waste as it was fed to it's siblings. Yikes!
Coot and Chick
Yellow Flag Iris
Red Campion
Lady Fern (Athyrium)

Tuesday, 19 May 2015

May 19th Mousehold Heath

Broom
It looked like a nice day despite for the odd dark cloud, but it wasn't raining. This made me decide on the fly to take a walk over to Mousehold to see if I can finally find myself my first green hairstreak of the year. They have been avoiding me so far and with a good spell of sunshine, I should see one today.

I got to Vinegar Pond and had some lunch before looking for these tiny green butterflies. When I had finished and began my search, a large, threatening cloud loomed over. A few drops of rain started to appear. Theoretcally, it was a light shower. In truth, I was getting wet. Good job I packed a coat before I left, but even so, it just soaked it up and got my trousers damp. I had no choice but to shelter under trees until it passed over. The rain was joined by hail and lasted for ten minutes. I was a bit worried as I heard a few rumbles of thunder nearby. Thankfully, though, the sun came back out in force.

The rays of sunshine was warm enough to evaporate the rain's dampness from my coat and trousers rather quickly. For a short few moments immediately after the shower had ended, water vapour floated upwards into the air from everything that was wet from the rain. Life, too, was back to normal like nothing had happend. Birds began to sing and dart into the gorse bushes with the sound of the feeding calls of hungry chicks from within the undergrowth somewhere. Bees and other insects resumed to pollinate the gorse and broom flowers. Just as the sun convinced me to come here in the first place, it had also convinced me to stay and continue my search. Was it too good to be true?


Green Hairstreak (from last year)
Another thing I had realized was that there no people when it was raining. I was here by myself. But when the sun returned, so did the people. It was like a magnet or something. The warmth of the sun was getting stronger and along the bare ground of the paths between the gorse bushes, green tiger beetles scurried at a pace by my feet. "That's one green thing, now for the other!" I said to myself. As soon as I uttered the words from out of my mouth, however, a green hairstreak appeared and landed on a gorse flower. Seeing it with my own eyes was one thing, finding it through the screen of my camera was another. As soon as I had found it with it, the butterfly took off and was gone!


Green Tiger Beetle


Absorbed in the search for another, I had not noticed the blue sky being covered by storm clouds. The sound of the sky growling with thunder made me decide it was time to go before I got wet again.

Monday, 18 May 2015

How To Draw: Bluebells

Take a walk around a British woodland in May and you will see a display of bluebells covering the woodland floor. In today's How To Draw, I am going to be a bit artistic when it comes to drawing a bluebell wood later. But first, I am going to show you how to draw an individual bluebell flower.

Stage One
To draw a bluebell, start at the top with two elongated, egg-like shapes for the top flowers. Then at the base, start drawing the stem downwards with a slight curve in it. As you draw the stem, draw the bells of the other flowers and the 'branches' that they droop down from as you work your way down the plant. Doing it this way can help you get each part with enough space inbetween and prevents making them look cramped together (unless, of course, that is the way you want them to look).


Stage Two
At the bottom of the bells, you need to draw at least three to four petals. They can be triangular and point outwards, but most of these petals curl inwards as characteristic of a bluebell. It is probably best if you sharpen your pencil for this part, that way you can get the finest of detail.


Stage Three


Redraw in pen and rub out the pencil marks when you are done. I add a light series of lines on each flower head. Just take it slow and easy, don't rush it to prevent mistakes.


Stage Four


Colour in your bluebell. I first use a light coat of light blue before applying purple over it. The stem is green.


Stage One


Now it is time to get artistic as I draw a bluebell wood. For this drawing, I am going to be impressionistic, similar to other impressionist artists such as Claude Monet and his lillypads. Instead of drawing every individual flower and blade of grass in great detail, I am going to use colour to give you an impression that there are hundreds of bluebells. It saves time and is a lot different to the usual way I draw things. First, I mark out a rough square on my drawing pad to show how much I want to draw, but you can use the entire page if you wish. Then I make a line quarter a way from the top to mark where the bluebells and the trees meet.


Stage Two
The trees are added at the top, using the line as a rough guide to where they should go. Distant trees are shaded in, while closer trees are either lightly shaded in or kept white and as a basic line drawing. Trees that appear close are allowed to be drawn over the guide line, but distant trees can be placed above it. I also mark out areas where leaves cover in front of them with a simple scuibble.


Stage Three
Redraw the trees in pen. Where there are areas of leaves that cover infront of the trees, I miss out parts of the trunks to give that impression. Shade in some of the more distant trees and add any detail such as thin branches and tree markings.


Stage Four


Shade in the whole area of where the bluebells are going to be with a light layer of green. I also colour in the areas of the leaves around the tree zone. Do it in a blotchy manner to give the impression of lots of leaves. At the base of the line dividing the trees and the bluebells, I create a layer of blue and purple dots to represent the more distant bluebells in the display.

Stage Five


It is time to add the rest of the bluebells. We don't want to completely swamp the sketch in a shade of blue, instead, I leave gaps as I dot the area in purple blobs. Make the flowers in the foreground much large than the rest stretching in the distance.


Stage Six


I add in more layers of green bluebell leaves and more bluebells. The foreground section of the display is created using much heavier lines of green, as a way to make it look as if you can see each leaf close up. The distant section of the display and leaves on the trees have a bit of yellow as if the sun is shining on them. The trees are also coloured in.


Stage Seven


Finally, I use a pen to give some impressionistic scribbles (don't go mad though) across the whole display, as well as a few fine branches on the trees. Impressionism works better if you stand back and look at the drawing (or painting) at a distance. So, prop up your sketch, stand back and look at it. What do you think? Hopefully, the sketch has come to life in a scene of colour. If your not happy, just keep adding more bluebells until you are.

I hope you have enjoyed this slightly different How To Draw. You can use impressionism to draw any flower display, not just bluebells. So, whether it is a meadow of buttercups or a garden covered in forget-me-nots, there is no excuse in not drawing them.